Tuesday, August 16, 2011

Mashed Cauliflower

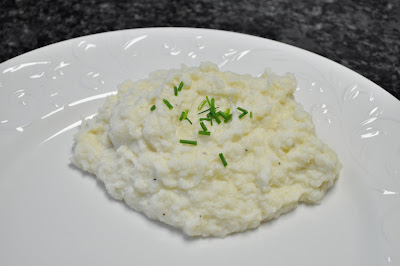
I've posted about this before, but I want to post this recipe again with an updated picture.

If you love mashed potatoes but don't love the high carbohydrate factor, you need to make these.  In my opinion, these are way, way better than most mashed potatoes. Maybe that's because I'm not a huge mashed potatoes fan if they're plain, but I'll eat these plain... and they're soo good!


Mashed Cauliflower
- 1 head cauliflower
- 2 tbs butter or margarine
- 1/2 cup half and half or light cream
- 1/2 cup shredded cheese
- salt, pepper, and garlic powder, to taste
- fresh chives, optional

Cut the cauliflower into manageable pieces and steam or boil until soft and tender, about 10 minutes.  The cauliflower should be soft enough that you can break it up with a spoon.

Add the cooked cauliflower pieces to a medium-sized sauce pan. Break up all of the large pieces with a spoon or masher.  Use an immersion blender to puree the cauliflower, adding the cream and some of the butter to the mixture. Continue blending until you reach the desired consistency. Depending on the size of your cauliflower head, you may need to add more or less cream. Season well with salt, pepper and a little bit of garlic powder. Stir in the shredded cheese and remaining butter.

Serve immediately as a substitute for mashed potatoes.  Enjoy!
Serves 4-6

We had this with grilled chicken and asparagus, it was amazing. Plus, you don't have to feel guilty if you want more, because it's mostly cauliflower! ;)

Monday, August 8, 2011

Wedding Shadow Box

I found a really pretty white shadow box at TJ Maxx over the weekend. I thought this would be a great way to display sentimental items from our wedding. So, here's what I put together yesterday.


I included a wedding invitation and an envelope with the amazing calligraphy, my garter, a rose from Kevin's boutonniere, cocktail napkins, drink stirrers, matches, the reception menu, and even a box from the favors. I think it came out pretty nicely. I can't wait to hang this up. At the moment, I'm thinking of doing a gallery wall in our bedroom with this at the center and pictures of us around it. I'm really excited to be able to display our invitation and other wedding items, without them having to be stuffed away in a scrapbook somewhere.

Sunday, August 7, 2011

Living Room Updates

This weekend was a busy weekend for us decorating the house. As you saw in the previous post, I added a new gallery wall in the kitchen, but I also did some decorating in the living room.  I visited so many home goods stores in a couple days, I was worn out. But, I found some really great things, and I'm excited to share them with you.


I was searching for blue accent items to tie the walls, furniture and rug together.  I found a cute blue glass bowl/platter thing for the coffee table, two new pillows, a blue basket for putting magazines and books in, candles and candle holders, and a new glass vase.  I was also searching for new lamps for this room, but I didn't find those this weekend.

Then... I found an amazing chair at HomeGoods, one that matches the color on our walls nearly perfectly. I was shocked when I found it and knew it had to come home with me! After buying it and trying to get it in my car, the sales person had to help me tie it down in the back of my trunk, hanging out with the door open. Thankfully, I got it home without problems and set it up in our living room. Here it is:


I love it. It's fun and it adds more visual texture/pattern and interest to the room. Plus it's extra seating and conversational seating at that, not just seating designed for TV watching, ;).  As you can see, I also got a little side table to put next to the chair and a fun vase/candle holder.


We also found a small shelf for housing all of our TV boxes because we have a cable box, xbox and a bluray/DVD player, that all have to connect to the TV but still look neat. So, I placed the little shelf to the left of the fireplace and it's working out well for the time being.  The space is very small, so there were very few options for furniture that would actually fit between the fireplace and window, yet still hold what we needed them to.  However, we haven't figured out a solution for our wires and cords yet. I think we'll get some cord covers to conceal them because I don't think we're ready for any more demolition and running cords through the wall. That wall will also be more difficult to work with because it's an external structure wall and a fireplace wall. So, for now, I think the cord cover will work fine, especially if we paint it the same color as the wall.


I hope everyone had a great weekend!

Saturday, August 6, 2011

Kitchen Gallery Wall

A couple of days ago, when I put up the chalkboard menu in the kitchen, I realized that it alone was a little small for that space. So, I set off thinking of things I could add to the wall to make it feel more decorated.

Since Kevin and I love cooking, restaurants and cafes, and Paris, I thought it might be fun to do a gallery wall of photos of these in black and white. I chose photos from Paris, specifically Rue Cler, the street where we stayed in an apartment on our honeymoon, and a couple other photos of French cafes and chairs.  It's really cool to have pictures hanging on the wall in our kitchen of the places we visited on our honeymoon. There are pictures of the bakery we visited at least once a day, the cheese shop and grocery store we shopped at before making a meal, a restaurant/cafe that we ate at, and pictures of the street.  I think that displaying photos of places like these are perfect for an eat in kitchen, plus they have so much meaning for us. We're really enjoying them.   Plus, this was a super inexpensive project because I used white frames that I already had and just had to print and get a few pictures enlarged!


And, here's what the area looks like now:


Click Here for post about DIYing the chalkboard menu.

So, I'm still working on thinking about what I'll do for window treatments for the bay window. Here's a better picture of the space, as it is right now. 


For now, I'm really liking these silk sheer curtains from West Elm, but who knows what we'll choose in the end ;)
Silk Paisley Window Panel


Shared at the DIY Showoff...
The DIY Show Off

Friday, August 5, 2011

Kitchen Curtains

I've been decorating the kitchen to make it look more finished but it still has a ways to go.  This weekend, I'm going to finish a gallery wall of pictures that will hang above and below the chalkboard I posted about earlier this week.  I'm really excited about that project. I can't wait to post about it, hopefully it will come out as I imagine!

So, next on my list is figuring out what type of window treatments to use around the bay window.  I think this will help make the space feel more polished.  As a reminder, here's what the space around the kitchen table looks like.


I'm debating between long curtains and roman shades. I'm leaning towards curtain panels mostly because the windows already have white wooden blinds and I don't think they would look right with a roman shade (and I don't really want to remove the blinds).
  

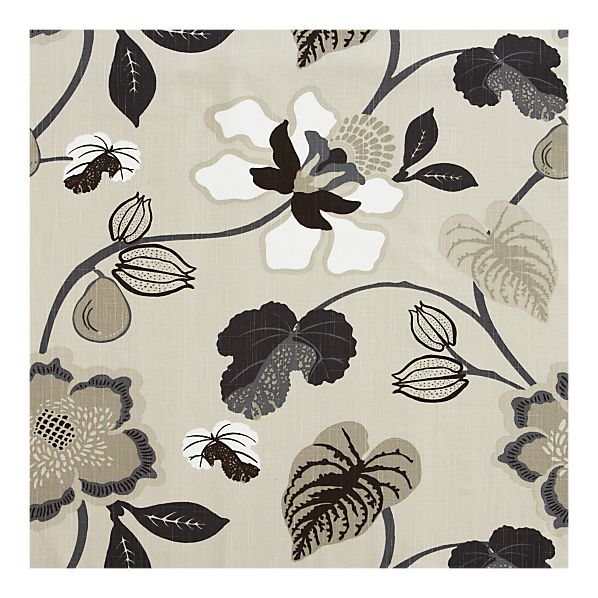
Then, for the design of the curtain, I'm not sure what direction I want to go. I've looked at lots of different styles... bold patterns or solids... neutral colors or those with pops of accent colors.

Cotton Canvas Faux Bead Window Panel  
Cotton Canvas Printed Crosshatch Window Panel  
  Firenze Embroidered Panel

However, I've had a hard time finding any curtains with accent colors that I like. Part of me feels like a curtain with a neutral pattern will be more successful in our kitchen. I think I'll probably try to tie in the blue wall color to a couple accessories in the kitchen and on the table, but otherwise, I like the neutral/black&white look.  Plus, when you're looking at  pictures online, it's hard to tell if fabrics and colors would look good in our kitchen and mix with the colors in our living room. I'm hoping to go to the fabric store sometime this weekend to look at swatches in person for ideas.

So, what do you think? Do any of these fabrics/curtains stand out to you? Do you have any suggestions for curtains or fabric? 

Thursday, August 4, 2011

Chalkboard Menu

If you've been on Pinterest, chances are you've seen one of the many projects and ideas floating around that use chalkboard paint to convert an ordinary object into something fun.  Well for this project, I made a weekly menu for our kitchen using a mirror and chalkboard paint.  I was inspired by some these pictures:

chalkboard menuDIY chalkboard weekly menu
Chalkboard frame/menu.Chalkboard menu
Cute weekly menuTutorial for a chalkboard menu board.

I bought an inexpensive mirror for this chalkboard.  The frame was originally dark brown (sorry, no before pics) and I painted the it white. I wanted to tie in with our cabinets and contrast against the black chalkboard. Then, I painted the mirror with a few layers of Rustoleum ChalkBoard spray paint. This spray paint is amazing! I tried using other chalkboard paint from the craft store and it was much harder to apply with a brush... it's hard to prevent brush strokes. Using the spray paint was so easy and quick! It really is that easy, tape off your area, add a few layers of spray paint and then allow to dry.  Then you can write on it with chalk! I love the fact that this could be a menu or anything else you want, like a place for a grocery list or just doodling for fun... and you can change it up whenever you feel like it.


I had originally planned to put this menu on the side of the fridge with magnets, but then I decided to hang it on the wall near our kitchen table and I think it works for now. We still have a lot more real decorating to go in the kitchen, but at least this is a step in the right direction! ;) Plus, hopefully this will motivate me to meal plan more consistently! 

Wednesday, August 3, 2011

Peach Ice Cream

This weekend I made the most delicious homemade peach ice cream. I got the recipe from Annie's Eats, she always has the best recipes, but it originally comes from one of my favorite food bloggers, David Lebovitz.  I love that all of the ingredients are fresh, there's no sweetened condensed milk or evaporated milk like some recipes.  It's so refreshing and light, perfect for a summer afternoon. Here's the recipe:


Homemade Peach Ice Cream1 1/3 lbs. ripe peaches, peeled, pitted and coarsely chopped
½ cup water
¾ cup sugar
½ cup sour cream
1 cup heavy cream
¼ tsp. vanilla extract

Directions:
Combine the peaches and water in a medium saucepan. Cook over medium heat, covered, stirring occasionally until the peaches are soft and cooked through, about 10 minutes. Remove the pan from the heat, mix in the sugar, and set aside to cool to room temperature.

Add the peaches and their juices to a blender or food processor with the remaining ingredients. Pulse briefly so that the mixture is well combined. For a smooth ice cream with no chunks of fruit, continue processing until smooth. Chill the mixture thoroughly in the refrigerator. Once chilled, transfer to your ice cream maker and freeze according to the manufacturer’s instructions.

Source: Adapted from Annie's Eats, originally from The Perfect Scoop by David Lebovitz


YUM! 
Blogging tips