Wednesday, August 22, 2012

DIY Upholstered Ottoman

I am so excited to share with you my most recent project... turning an old table into an upholstered ottoman! It was actually really easy and I think the result is a very professional looking ottoman! Here's how I did it. 

I already had this coffee table, but you could easily find one like this on Craigslist or maybe you already have one around the house. Anything that has legs that you like and an easy shape to cover will work. If the table is taller, you can cut the legs down so that the ottoman will be comfortable for resting your feet on.  This one was fine, so I didn't do that step. 
First, I painted the legs. You could stain them or leave the legs as they are, whatever you prefer. I used Martha Stewart Light Reflections paint and gave the legs a slightly distressed finish. Annie Sloan Chalk Paint would be a great option too. 
Because of the shape of my table, I added wood around the bottom, so that the finished shape would be straight on the sides and I would have something to hammer my nail heads into. 
If you are going to want to add tufting to your ottoman, go ahead and figure out the placement of the buttons.  For my square ottoman, I decided to use this pattern of button placement. 
Drill holes in your table(!) where the buttons will go, so that you will be able to thread a long needle through later.
Cut your foam to fit the top of the ottoman. I used 2" high density foam from JoAnn's fabric. It usually cost's about $32 a yard, so be sure to get it on sale or use a coupon! To cut the foam, use a marker to draw a straight line and then use a sharp blade, like an Exacto knife, to cut through the foam (a serrated knife from your kitchen even works well). 
Use spray adhesive to glue your foam directly on top of the table.
Next, I cut foam strips to go on the sides. This makes it comfy on the sides so you won't hurt your leg if you bump into it. Use the adhesive to get it to stick and stay in place. At the end of this step, you should start to see your ottoman coming together!
Cover the foam and table with batting. 
Use a staple gun to staple the batting to the underside and pull tightly to get the shape on top that you like.
I cut out and stapled down the excess fabric on the corners and underneath, so that there was no extra batting hanging down.  Now your table is really starting to look like an ottoman! 
Place your fabric on top of the ottoman and make sure you have it lined up properly if you have a geometric fabric.  I tacked it in some places on the bottom to make sure it stayed in place. 
Flip the table over and staple the fabric to the wood.  Work around the sides making sure it is pulled tight.  I made straight seams down the side on the corners, but you could do a lot of different things to finish the fabric at the corners however you like.
To add the buttons, push a long sturdy needle straight up from the bottom, through button covered in your fabric, and then back down.  You can secure the knot on the underside of the table with another button or some nails to hold it in place. Make sure you use heavy duty upholstery thread, it won't break from the tension. Pull all of the buttons so they are equally as deep in the foam as the rest.
Yay, a tufted ottoman!
The last step is to add decorative nailheads along the base of the ottoman. Use a rubber mallet to hammer them in without damaging the surface of the nail heads. I placed the nails about 1 inch apart and used a pen to mark all of the holes, so they would be in a straight line. 

And there... you're done! Now you have a great and much more inexpensive upholstered ottoman, in the fabric of your choice!
DIY Show Off
TDC Before and After

Monday, August 6, 2012

More progress!

Well, I made some more progress in the living room this weekend. You may have seen the green print chairs that I bought a couple weekends ago, but I decided that they were throwing everything off in my head. As I was trying to pick fabrics that coordinated, ever I liked just didn't work with those chairs.
So, I was able to get some similar chairs that are linen and I'm really happy with them, they're staying... no more changing my mind! 
Old chairs
New chairs
I am really happy with these chairs, here's a picture that I posted on Instagram this weekend. I love that they're neutral and go really well with the curtains!

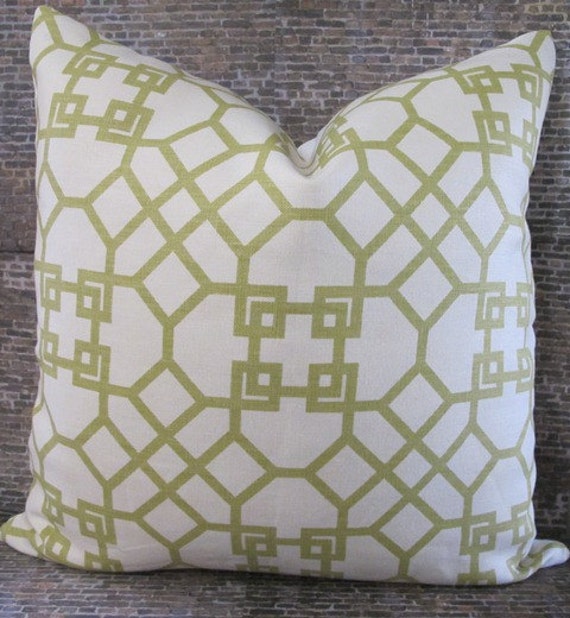
I also ordered the pillows that I've been eyeing on Etsy for a while!  I got two Windsor Smith for Kravat pillows in Pelagos Lime from this Etsy shop.
Designer Pillow Cover 18 x 18-  Windsor Smith - Pelagos Green
I know they will look great with my curtains and sitting in those linen chairs. Here is a picture of this pillow paired with a pillow made of the same fabric as my curtains.
Living Room fabrics?

I also started a new project that I'm working on for this room. I have been debating on what ottoman to buy for the room, and after seeing a bunch of plain and boring options, I've decided to make my own!  My brother just moved out of his college apartment and when we helped him move out, I realized that he had my old square wood coffee table... and that I could take it back and make an upholstered ottoman out of it! Here's a picture of it from a long time ago, at our old apartment, in the back left of this picture (right after we got our dog Darcy).

I found a couple of tutorials online that I will use as a guide to covering this ottoman. But, basically I will cover it with foam and batting and then upholster it in fabric, hopefully adding covered buttons for tufting.  I'll paint the legs and I think it should end up something like this:
[otto4.jpg]

First, I picked out the fabric that I want to use. I decided on a blue gray geometric pattern with a cream background and a knubby texture, I think it will work great on an ottoman. Also, it actually reminds me of an ottoman at West Elm.
Casablanca Geo by Robert Allen Home
West Elm Essex Printed Ottoman
So, since I'm waiting for the fabric to come in, I decided to start things off by picking paint for the legs and painting them.  I originally wanted to do Annie Sloan Chalk Paint, but decided I would try something else first and then go to that if I didn't like it. I've seen Martha Stewart paint which can be made in a lot of unique finishes at Home Depot for a while and I've been curious to use it, so I picked up a quart to test it on these legs!  I picked the Lightstrokes specialty finish and the color Hearthstone, which is a silvery-beige.
Martha Stewart Lightstrokes paint chips
After one coat of paint on the chair legs
After two coats of paint on the table legs
So far, I'm excited! I like that when you turn off the overhead light you can see the unique light reflection that this paint has. In some light it looks matte, but in others it has a bit of a shimmer. I should hopefully get the fabric for the ottoman this week in the mail and I might be able to start covering the ottoman this weekend!

Monday, July 30, 2012

Loving our new grass!

This weekend, we finally finished up our most recent giant undertaking, completely re-sodding our front yard!  It has been a lot of work, but I really think the end result is beautiful. Yesterday, when I came home from the grocery store, I literally said out loud, "OMG, it looks so good! Eeek!" because Kevin had finished it up while I was out.

When we bought this house, we started out with a mixture of grass and weeds. The lawn didn't look that bad and it was green, but when you walked around on it, you would find about 5 different types of grass and it was being taken over by weeds.  Also, since some of the grasses were different types, in the winter, we had a splotchy green and brown mess... we decided that the best solution was to kill everything and start over.

So, here are some pictures of the grass now, it looks a million times better than it did only a few of weeks ago. We're so glad that it turned out well.

Here's the process that we followed, for anyone interested.
Our original grass/weeds
1. Kill all grass and weeds with regular Round-up (i.e. not the long lasting stuff) by spraying multiple times, wait a couple of weeks for everything to die. If you have any bermuda or extra crazy weeds, it will take multiple applications, with time in between, to get rid of everything.
Killing our grass (left) and our neighbor's grass (right)
Waiting for all of the grass to go brown
2. Mow the weeds and grass on the lowest lawn mower setting to almost scrape the dirt and get rid of a lot of the weeds and grass.
3. Till the ground to 3-6" depth with a tiller (you can rent one for a couple hours to a day for pretty cheap)
4. Rake out and remove all of the loose debris in the dirt.  Add topsoil or a mix of compost and soil to the dirt and mix with the existing dirt.
Our yard after tilling, raking and adding more soil
5. Add a starter fertilizer and lime to the soil before installing sod.
6. Lay the sod. Make sure to stagger pieces like bricks and place small pieces between others instead of at edges where they can dry out.
Laying the sod
Sod on the pallets
Sod finally down in the front yard!
7. Water 3 times a day for 3 weeks, then go to a more normal watering schedule.
Watering the grass after installation
8. Enjoy the fruits of your hard work and lush grass!
Blogging tips